In part 1 of our blog series on Dropper, we introduced you to the basics and various areas of application of this plugin for JTL-Shop (Dropper – A modern content system for JTL-Shop (part 1)). In today’s second part, we will introduce you to the importance of landing pages as an important part of a customer-oriented content strategy. Dropper makes it possible for you to create appealing landing pages with a variety of modern design elements for the JTL-Shop in just a few simple steps. You can also find out how best to do this in this article.
Why are landing pages useful for my JTL-Shop?
Landing pages for stores are always used when you want to break out of the mold of a normal category or product page. A landing page always pursues the goal of meeting the expectations of visitors in the best possible way, increasing their willingness to buy and converting them into paying customers. Many studies and practical examples show that successful landing pages are characterized above all by the following properties:

Setting up a first landing page in the JTL-Shop
Now let’s get down to practice. In contrast to a standard category page, which only shows a title, a short description and a list of items, we now want to create a landing page that communicates the benefits and details of a specific product group. On this exemplary landing page, we would like to show you step by step which design options Dropper offers you and how you can use them. For example, we will include selected information on the manufacture of these products and also give the landing page a special look that differs from the general category or manufacturer pages.
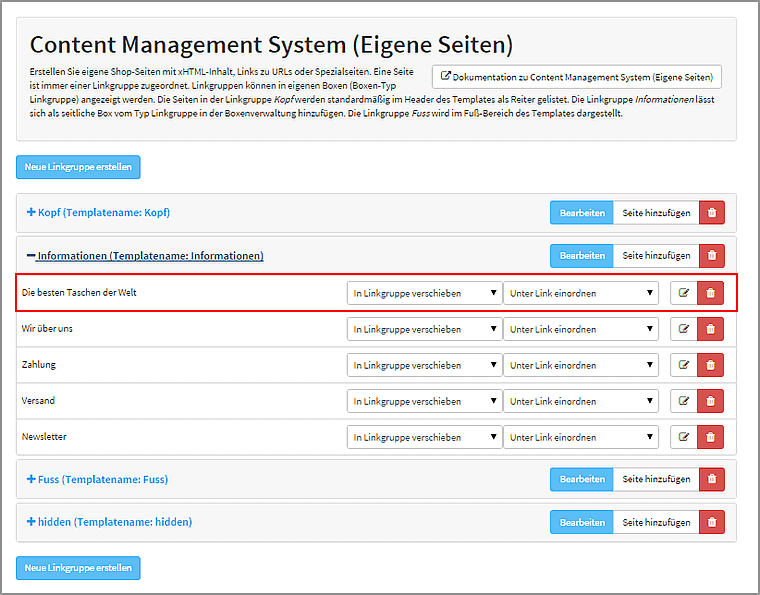
The JTL-Shop offers us the possibility to create our own pages. However, it is difficult to conveniently maintain content on these pages without detailed knowledge of HTML and CSS. We are also denied access to existing data in our store (e.g. images and descriptions of products or categories) in our own pages. Dropper fills this gap. Let’s take a look at exactly how in the following example.
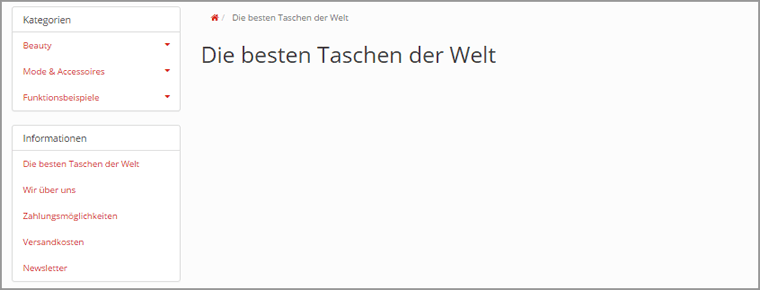
As you can see in the screenshot above, we have a product group in our store that we call “The best bags in the world”. We would now like to highlight this product group on a separate landing page. By the way, in our example we are working in a JTL-Shop 4 with the included standard template EVO. We chose Simplex for the theme.
Update-Hinweis (Stand: 12.2022)
Die technische Unterstützung für JTL-Shop 4 wurde im November 2022 eingestellt. Wir empfehlen allen Shop-Usern dringend das kostenfreie Upgrade auf JTL-Shop 5.
Create a CMS page in the JTL-Shop
First, we add a new custom page with its own HTML content to our JTL-Shop (see also the JTL-Guide: Creating custom pages in the JTL-Shop). We leave the content of the new page completely empty at first – this will be provided later by our drops.
Tip: Details such as meta title and meta description are particularly important and relevant on landing pages. You maintain this content directly in the input mask of your own page. Please give sufficient thought to a targeted formulation, place the desired keywords accordingly and ensure that your meta information is sufficiently differentiated from other (category) pages in your JTL-Shop.
Create a flex layout and insert initial content
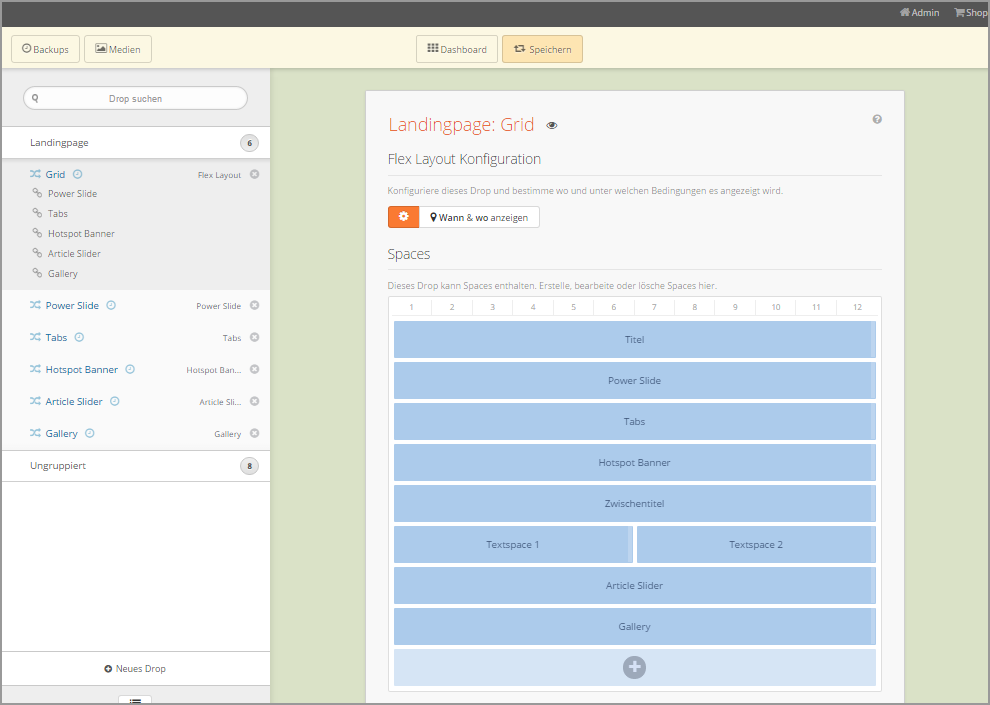
With the Flex Layout Drop, we create the basis for our landing page: It provides a grid system with which we can easily arrange and manage content. We call the flexible elements of this grid system Spaces. These spaces can contain text formatted using HTML or any other drop. So we create a Flex Layout Drop and name it accordingly.
It makes sense to start our page with a title. So we create a space and insert the HTML-formatted title of our page here, which will also be the H1 heading.
The first content is there, now we’ll take care of the correct display in the JTL-Shop. The Flex layout should replace the entire content on our previously created custom page. As with any other drop, we can do this with just a few clicks under When and Where to display.
After saving, the first step with Dropper is done. We have entered content and this is displayed on our new landing page:
Inserting and designing additional drops in the Flex layout
After the fairly simple new sellers, we now move on to the actual content, which we want to enter and display via separate drops.
Powerslide
Let’s start with our Powerslide Drop, which we already got to know in the first part of this blog series on Dropper. Inserting a drop into our grid is very easy with Dropper: we can drag and drop drops directly into the flex layout. This automatically creates a space in which our drop is linked. It is also possible to create additional drops in this way.
The Powerslide Drop offers us an easy way to insert sliders with images and overlay texts on our landing page. In our example, we choose three appealing ambience images with our bags and gradually add suitable overlay texts to them.
This is where some of the Powerslide Drop’s useful functions come in handy: we can determine both the image orientation and the positioning of the overlay text for each slide with a single click. The tedious cutting of the images to the width of the content area of our landing page is completely eliminated.
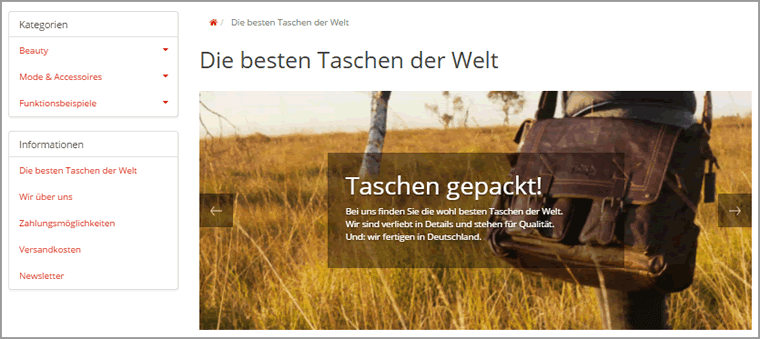
For the time being, we are not using page navigation or linking slides to store content. After all, we just want to create an atmospheric setting and tease some of the advantages of our products.
Tab Control
After the visual introduction, we now want to offer our customers general information in the form of text. With the tab drop, we also gain space for longer texts and present content in an organized and easy-to-read manner.
Each tab can be given a separate title and HTML content – similar to the Powerslide. It is even possible to link to other drops in the content area of a tab. For the sake of clarity, however, we will leave it at this point with simple content that only contains some basic HTML formatting
Hotspot banner
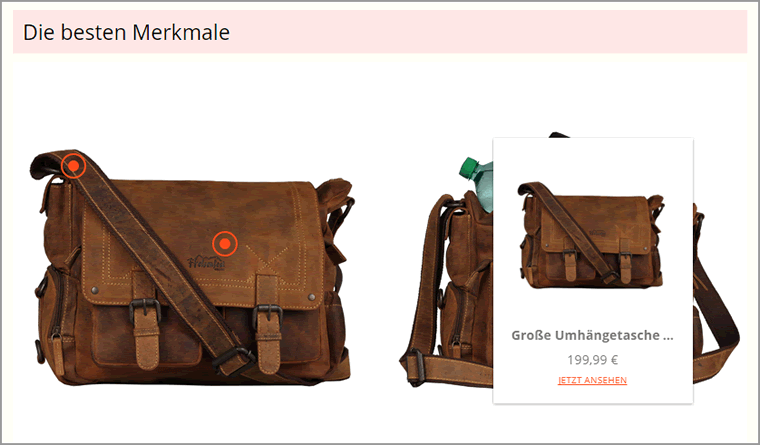
The hotspot banner offers us the option of dynamically adding interesting points, so-called hotspots, to a banner image. These hotspots display further information on mouseover. In our case, we choose two exemplary images of our bags and explain the details shown with the hotspots.
The information on the hotspots (images, titles, texts) can be entered manually. Alternatively, we can also obtain this information from JTL-Shop data sources. This makes it easy to tease and link a product, category or manufacturer page with a hotspot.
Two hotspots with their own content and a link to a product should be enough for us at this point. In addition, we have added a subheading (The best features) in our grid space:
Place individual drops next to each other
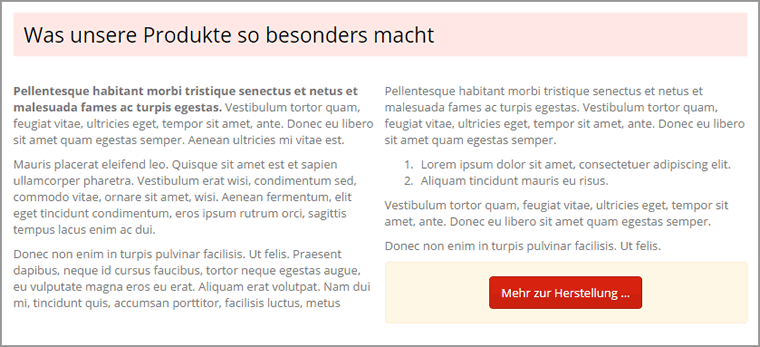
So far, we have only used drops that are displayed across the full width of the Flex layout. However, it is easily possible to place spaces of the grid (and therefore also individual drops) next to each other. In our example, we use this feature to arrange two Spaces with formatted texts next to each other:

As you can see from the animation, it is also possible to change the order of the individual spaces using drag & drop. This allows you to experiment with existing landing pages or add suitable content at a later date.
Article Slider
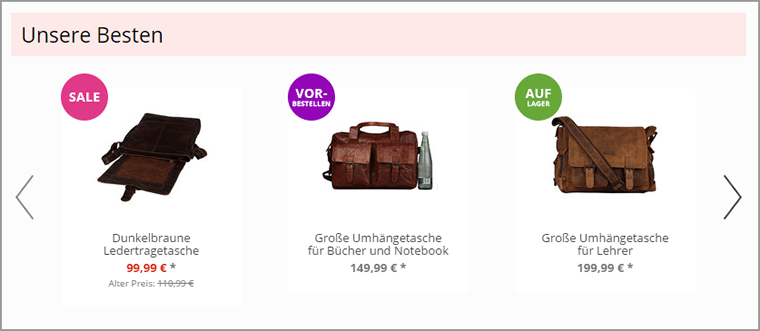
With the Article Slider Drop, we can display products directly in a slider. And not just via a manual selection: Products can be selected from different sources, such as manufacturers and categories, and can also be restricted using feature or special filters. This makes it easy to select explicit (special) listings from a specific category as the source of our article slider.
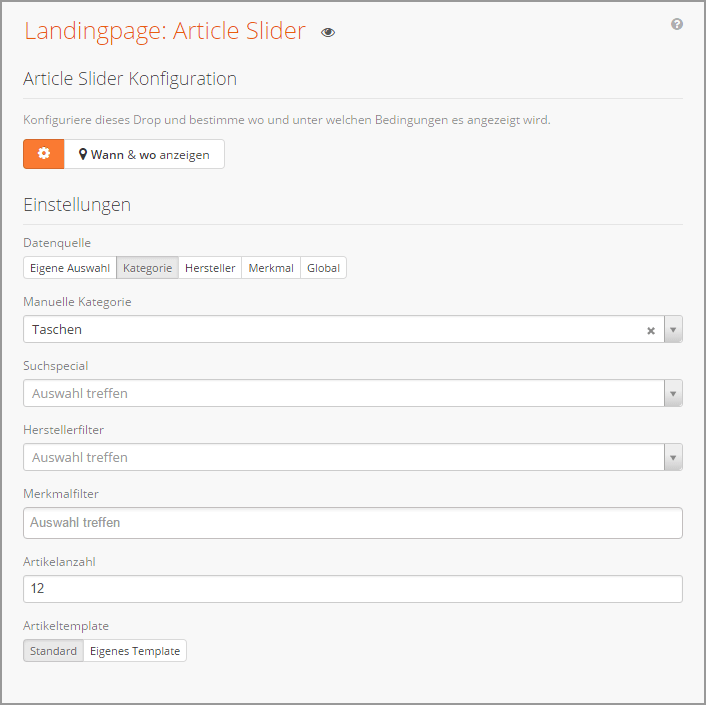
For our demo example, we will limit ourselves to a simple category filter and simply select all products in the bags category.
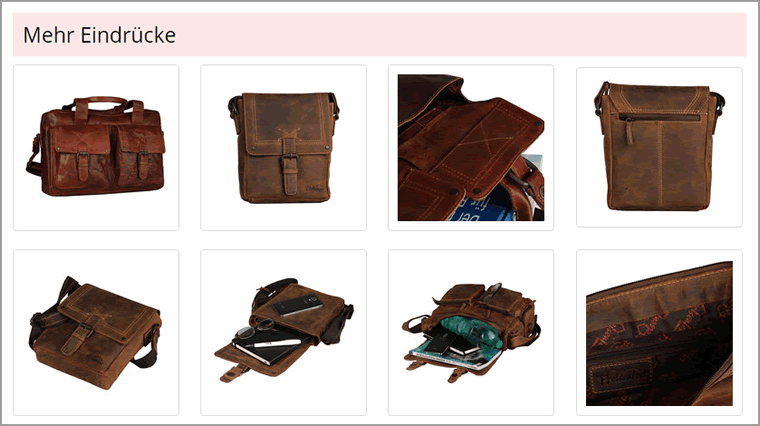
Gallery
Finally, we want to add an image gallery to our landing page. With the gallery drop, we can easily set several images from local sources, the web or from the dropper media gallery as gallery images. Helpful here: The size of the preview images can be flexibly defined in the settings, the drop then ensures that they fit perfectly.
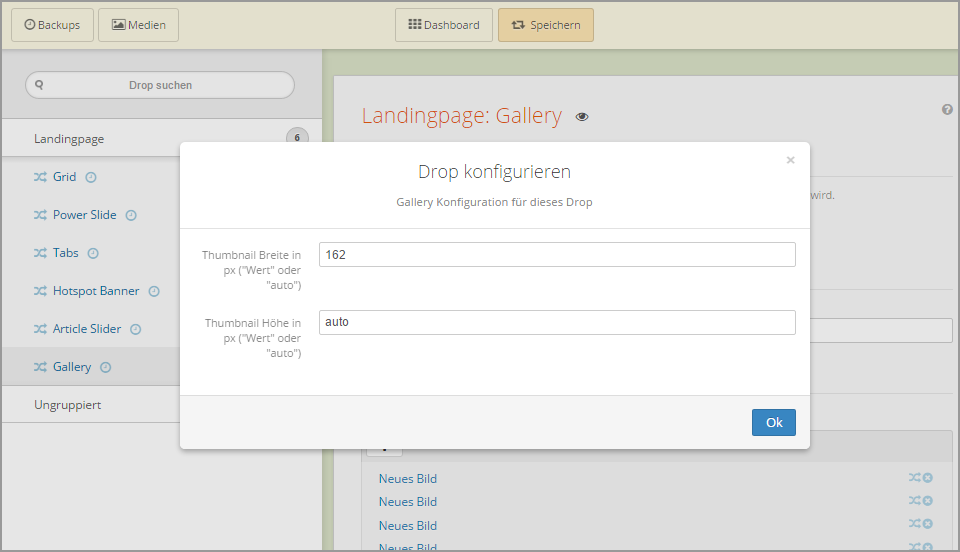
In our example, we set the size of the thumbnails so that the gallery takes up the entire width of our landing page.
The visual fine-tuning for your landing pages
All drops provided by us are optimized for display in the Tiny (JTL-Shop3) or the new EVO template (JTL-Shop 4). For highly customized templates, CSS adjustments may therefore be necessary to adapt the drops to the corporate identity of your own online store.
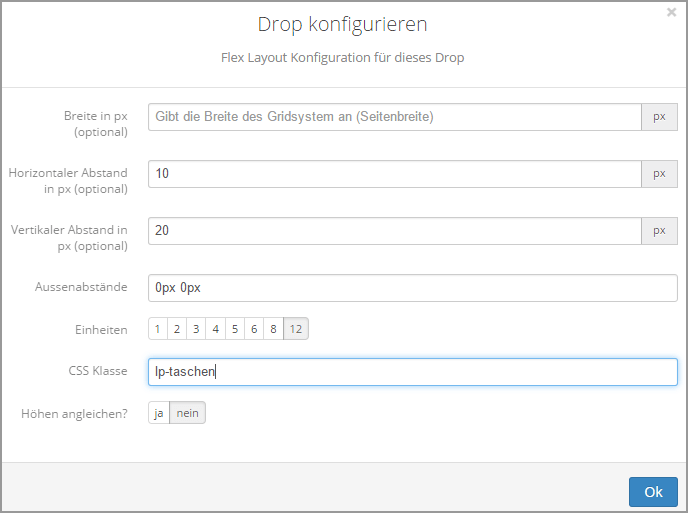
Dropper inserts the included stylesheets into the source code of the JTL-Shop in such a way that they can be easily overwritten in the CSS file of the template used. This is therefore the ideal place to make optimizations and adjustments. In our case, we only corrected a few colors and spacing to achieve an appealing look. The rest of the styling is done by Dropper in cooperation with the CSS classes provided by the template.
An example of how you can customize the look of your landing page with two simple CSS rules:
.lp-taschen .tab-content {
padding: 10px;
}
.lp-taschen h3 {
background: #FDE9E7;
padding: 0.5em;
color: #000;
}
By the way: In order to be able to target our Flex layout with these CSS rules, we have set the CSS class lp-pockets in the setup.
The landing page for the JTL-Shop is ready
We have now mastered the technical implementation of our landing page with the help of droppers and various drops. In just a few minutes, we have created an appealing landing page that blends in well with the look of our online store.
In the following short video clip we can see the results of our work in the front end of the JTL-Shop: Short dropper landing page demo – the landing page now shows all previously set up elements in the desired order.
Conclusion on the use of landing pages in the JTL-Shop
In this article, you learned how easy it is to implement a landing page in your JTL-Shop. But that alone is not enough: The most visually stunning landing page is of little use if it is not visited or does not convert. The beginning of a landing page is not the technical implementation, but its conception.
Good knowledge of your target group and a well thought-out strategy for the optimal visitor approach should be in place before you start working on implementation. Intensive keyword research is also important in order to find out and determine which entry point and expectations your visitors should use to click on your landing page. Only then can the visual implementation of your landing page begin. With Dropper, the latter is no longer a big problem, which we hope we were able to show you with our small example.
With the Flex Layout, which we used for our landing page, you can realize many more customizations in your JTL-Shop. For example, you can use the numerous design elements to give your store’s homepage a completely new look. It is also possible to replace the header areas of category and manufacturer pages. Or you can create friendly team introductions on the About us page and design your contact pages in combination with Contact Form Drop to create tidy and unique form pages that people like to spend time on. As you can see, our example landing page implemented in the article was just a selection of the many possibilities available to you with Dropper
Outlook for part 3 of our blog series on Dropper
In this and the previous blog post, we have already introduced you to a whole range of our Drops. More will be published in the coming months – our medium-term goal is to map all common content elements in eCommerce with Drops. But what if you have very specific requirements for JTL-Shop? Ask Kreativkonzentrat and hope for a development? No. Why not simply develop your own drops?
Our custom drops demonstrate the true strength of Dropper: we designed our content system from the outset to make it particularly easy to write your own drops. An experienced web developer can use custom drops to solve specific requirements and draw on our extensive developer documentation. Of course, they also have access to all the features and controls that the dropper infrastructure also offers conventional drops.
In the next and final part of our series, which will be published at the beginning of 2016, we will demonstrate the procedure using a simple custom drop. If you don’t want to wait until then, we recommend our developer workshop on YouTube.
We wish you a relaxing holiday season and would like to draw your attention to a small Christmas promotion in our store that will run until the end of the year: Every day we present a different drop or plugin and have reduced it by 24% for you. Santa Claus in the footer of our website will show you the way – so, just have a look :).
Until then! Your Kreativkonzentrat.